Chromatography Flowers are not just pretty, they’re a lot of fun, easy to create, cheap, and they are a creative way to teach kids about chemicals, as well as showcase an important way chemicals can be separated!
What are Chromatography Flowers?
Chromatography is the separation of chemicals in a mixture, and Chromatography Flowers are a beautiful example of this technique! In chromatography there are two phases: stationary and mobile. The stationary phase is the material used to “catch” the chemicals, and the mobile phase is used to “carry” the chemicals along the stationary phase. In this case, filter paper is the stationary phase, and water is the mobile phase. As the mobile phase carries the marker ink along, the different chemical dyes that make up the marker(s) elute (or separate from the mixture), and they elute at different times because of their different chemical properties.
–filter paper (I used qualitative filter paper from my lab, but you can use coffee filter paper as well. Try to get decent quality, more rigid coffee filters, and if you find a good brand/type that works please share!)
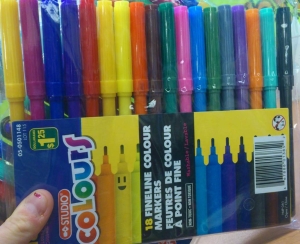
–markers- The cheaper the better (like those to the right)! If you use nicer markers you may need a stronger solvent than water. In that case, you could try rubbing alcohol, but remember to keep safety in mind!
–water
–scissors
–nickels
–small cups/jars/bowls
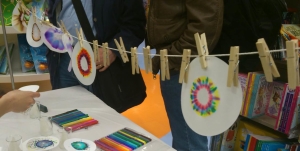
-if you are an educator, or if you are running a science demo, you may also want a couple of stands with posts (like retort stands), clothes pins and some string so you can hang up everyone’s art to display and dry, like shown below!
What to do?
First set things up:
1. Fold up a piece of filter paper so that it comes to a point and can stand inside your cup/jar/bowl with the top sticking out. You may need to play around with this a bit depending on the shape of your filter paper and what you are placing it in. Then cut off a small part of the tip of the folded paper and make sure the narrow top is still sticking out of the container you’re using. Note that you don’t need to cut off the tip of the folded filter paper, but if you cut it your flowers will “form” much faster, and they may even spread onto more of the paper.

2. Place the folded filter paper in your cup, jar or bowl (I used a beaker because that’s what I had handy in the lab!) and add enough water so that the bottom of the filter paper is immersed in water. You can reuse this set up to make as many chromatography flowers as you want, but repeat steps 1 and 2 if you want more than one flower “running” at a time.
Next comes the Chromatography Flowers!
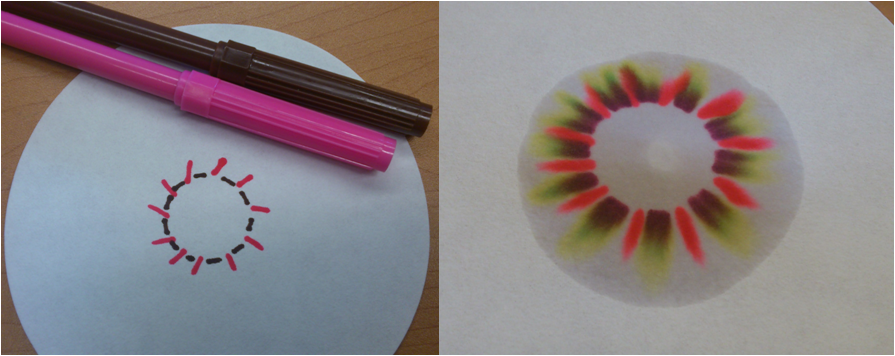
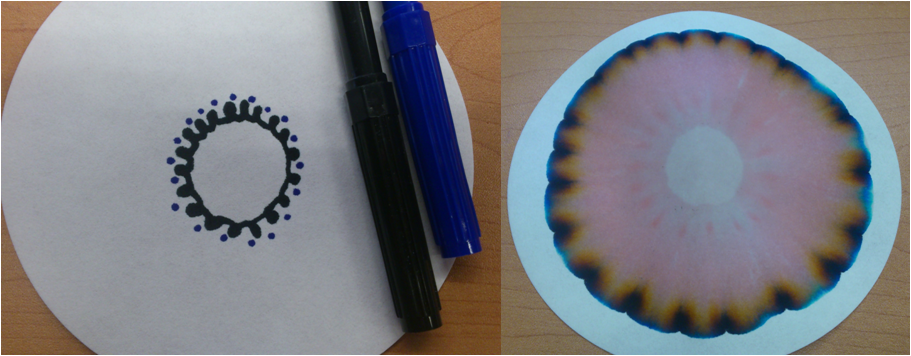
3. Now comes the fun part! Take a new piece of filter paper, place a nickel (or something around the size of a Canadian or US nickel) at the center and use markers to draw a simple design around the nickel. You may think that more than one color of marker produces prettier flowers, but you might be surprised what one color can produce! I will show some examples towards the end of this post.
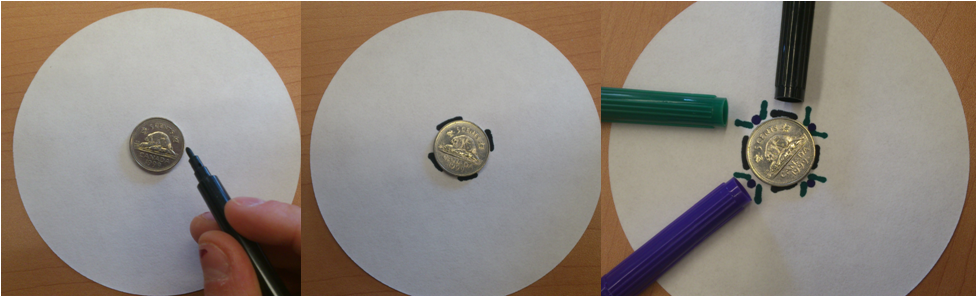
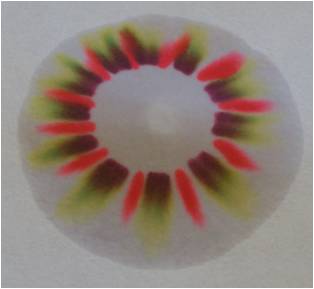
4. Once you’re done drawing, you can start the science! Take your filter paper with your drawing and place the center of it on top of the filter cone in the set up you made during steps 1 and 2. Watch the beautiful flower form as the water spreads across the filter paper. You may find that you need to hold the filter paper down with a nickel, like the feature photo shown at the top of this page. The flower is finished when the color reaches the edges of the filter paper or when you only see water moving along the filter paper.
I mentioned earlier that you may be surprised by a Chromatography Flower created using only one color marker. Here are some neat examples!
Here are some more lovely examples!

All images are ©Chemicals Are Your Friends. Please contact us to ask permission to use them.